
Applying Paint Protection Film (PPF) over chips or paint defects is a common question among car owners looking to preserve their vehicle’s appearance. While PPF is designed to protect a car’s paint from future damage, it’s important to understand whether it’s advisable to apply it over existing flaws like stone chips, scratches, or swirl marks.
This article explores the ins and outs of applying PPF over damaged paint, the risks involved, best practices, and how to properly prepare your car’s surface before installation.
What Happens If You Apply PPF Over Paint Chips?
Applying PPF over paint chips might seem like a convenient way to stop further damage, but it has several drawbacks.
- Visible Imperfections: PPF is transparent and flexible, but it doesn’t hide imperfections. Chips and scratches will still be visible underneath.
- Trapped Debris: If the chipped area has loose paint or debris, it may get trapped under the film, creating bubbles or uneven surfaces.
- Adhesion Problems: Chips can create gaps or craters that reduce the film’s adhesion, potentially leading to lifting or peeling over time.
If aesthetics and film longevity are important, applying PPF directly over chips without repair is not recommended.
Can PPF Prevent Further Paint Damage?
Yes, when applied correctly to a smooth and clean surface, PPF acts as a durable barrier against:
- Rock chips
- Road salt
- UV rays
- Tree sap
- Bug splatter
- Light scratches
However, PPF is not designed to repair paint. It’s a preventive solution, not a corrective one.
Should You Fix Paint Defects Before Installing PPF?
Absolutely. Addressing any surface imperfections beforehand ensures better adhesion and visual clarity.
Recommended Pre-PPF Surface Treatments
- Touch-Up Paint: For small chips, using manufacturer-matched touch-up paint can help level the surface.
- Paint Correction: Swirl marks, oxidation, and fine scratches can be removed through machine polishing.
- Panel Repainting: If the damage is extensive, repainting the affected panel might be necessary.
- Surface Cleaning: Decontamination using iron removers and clay bars will remove embedded particles.
Taking the time to correct defects results in a cleaner, smoother look under the film and ensures that your PPF lasts longer.
What Happens If You Skip Paint Correction?
Choosing to install PPF over an uncorrected surface can lead to several issues:
- Trapped Imperfections: Chips, scratches, or dust can remain visible.
- Optical Distortion: Uneven surfaces may cause light refraction, making the finish look wavy.
- Reduced Film Life: Poor adhesion due to rough or damaged paint increases the risk of lifting or edge failure.
It’s also worth noting that PPF installation warranties may not cover issues caused by improper prep.
Situations Where PPF Might Still Be Applied Over Chips
There are cases where a vehicle owner might choose to apply PPF over chips or defects:
- Leased Vehicles: If you’re leasing and want to protect the paint without investing in repairs.
- Budget Constraints: When full correction isn’t affordable but future damage needs to be prevented.
- Temporary Protection: For short-term protection before a planned respray or correction.
In such cases, it’s crucial to at least stabilize the defects (e.g., touch-up paint, clear coat sealant) before applying film.
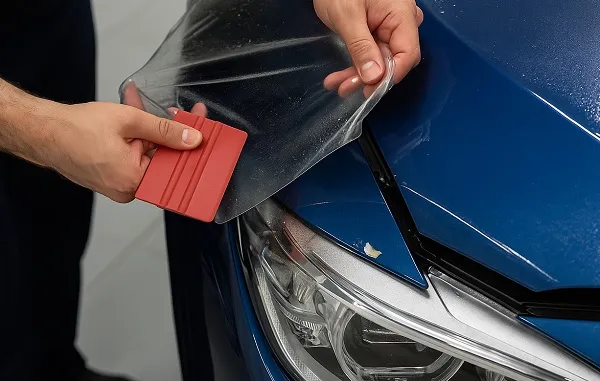
How to Properly Prepare Paint Before PPF Installation
Step-by-Step Paint Preparation
- Wash Thoroughly: Use a pH-neutral car shampoo to remove dirt and grime.
- Decontaminate: Apply an iron remover and clay bar to remove embedded contaminants.
- Inspect the Surface: Under proper lighting, assess swirl marks, chips, and scratches.
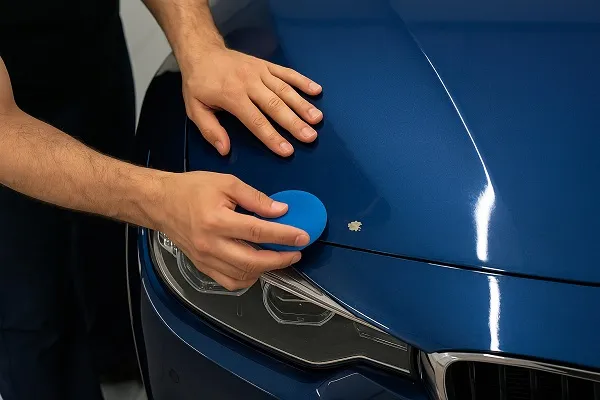
- Paint Correction: Use dual-action polishers to remove light scratches and swirls.
- Touch-Up Chips: Apply color-matched paint carefully and allow it to cure.
- Panel Wipe: Remove any oils or residue using an isopropyl alcohol solution.
- Dry Environment: Make sure the vehicle is completely dry before film installation.
Proper preparation is key to achieving a seamless, long-lasting PPF application.
Is PPF a Substitute for Paint Correction?

No, Paint Protection Film is not a substitute for paint correction. Here’s how they differ:
| Aspect | PPF | Paint Correction |
|---|---|---|
| Purpose | Protection from future damage | Removes existing paint imperfections |
| Effectiveness | Prevents chips, scratches, fading | Restores gloss and smoothness |
| Application Time | 1–2 days | Few hours to a full day |
| Longevity | 5–10 years | Depends on paint care |
Think of PPF as the armor your car wears after it’s been cleaned and polished—not a patch for existing damage.
Do Installers Apply PPF Over Imperfections?
Professional PPF installers usually recommend correcting any imperfections before film application. Some may refuse to apply film over obvious damage, especially if it will compromise the film’s performance or lead to a dissatisfied customer.
If you’re unsure, ask for a surface inspection before booking a full PPF service. A reputable installer will guide you through the prep process and recommend the best approach.
Should You DIY or Go to a Professional?
While DIY PPF kits exist, applying film over imperfect paint significantly increases the complexity. A professional installer has:
- Paint correction tools
- Clean, dust-free workspaces
- Experience detecting hard-to-see defects
- Access to higher quality films
Professional installation is strongly recommended, especially when dealing with damaged or repaired paint.
Key Takeaways
- Do not apply PPF over chips or defects without addressing them first.
- Correcting paint beforehand ensures better adhesion, appearance, and longevity.
- Touch-up paint and paint correction can help prep the surface properly.
- PPF is a preventive, not corrective, solution.
- Consult with a professional installer before applying film to compromised surfaces.
PPF is one of the best investments for long-term paint protection, but like any shield, it needs a smooth surface to rest on. Taking the time to prep and correct your car’s paint will pay off in appearance, durability, and peace of mind.